In the world of exciting inventions, what if I say, you can have a dramatic experience by creating stuff yourself? Isn’t it such a compelling thought to relive your favorite movie moments in just a few bucks?
Yes, for sure, doing something extraordinary from something ordinary is all we ever wished for.
Creating something yourself always has some significance compared to getting it from the market. Let’s take an example of a hoverboard. Hoverboarding is such a fun thing to do.
Hovering around with a hoverboard has become a sensation a few years ago. But since then, we can see, its fame didn’t burn out, Right?
Still, most people struggle and want to find the thrill they miss with this market-bought device.
So, we can see that creativity can give a little kick, right? What if I say making a hoverboard at your home is not as difficult as it seems? So many of you will disagree at first. Or simply reject the idea by doubting their dedication.
But don’t forget, we have so many among us that are the packers of passion. And need something to convert their energies.
In this blog, we got you an extensive guide on, How to Make a Hoverboard.
From people having college assignments to those of you who want to show their creativity, this article will help in every way. And yes, you are not stuck with a single method.
We take different techniques and budgets into consideration. So, without worrying, get into it and make the one that stands out!
Things to Know Before Making a Hoverboard:
Before going into this process, you should look at some vital points. They will help you and give all the answers you must have in mind. So, without further ado, let’s have a look.
- Never expect your hoverboard to be the replica of the one you get from the market.
- You can’t have a self-balancing mechanism with any methods mentioned below.
- Getting an automatic switch is something only the market hoverboards can give.
- Take as much power as you can, and never compromise on the number of your batteries.
- Always make sure your materials are up-to-date and not expired or old.
- Don’t forget the essential step of testing, as it shows safety.
If you keep these things in mind when making your hoverboard, trust me, you’ll end up with the best piece. Moreover, let’s talk about different methods you can use.
Methods of How to Make a Hoverboard
There are so many ways to make a hoverboard, but here we’ll discuss only three major ones. All three of these are both economical and easy. Unlike a market-based hoverboard, you’ll get yours for under $100! So, without wasting any second, make our way through it.
- Iron Railroad Spikes and Nails- Electromegnatic Push Method
- Wood Hoverboard with laptop Batteries
- PVC Pipes and Plywood Hoverboard- Overall Method
Now, we’ll take you through each method in detail. With each step, you can have a clear view of its making. So, don’t worry, and buckle up! We are off on a fun ride!
You may also like these products:
Iron Railroad Spikes and Nails- Electromegnatic Push Method
The electromagnetic push method is not as famous as the other two, but still, it’s more economical than them. So, skipping this one would be wrong for people who prefer more tricky work for a few dollars. Not to forget the thrill you get from this method. It’s educational and covers benefits on so many levels. Let’s look into the material needed.
Materials to Need:
- Six 6 inches iron railroad spikes
- Enameled Copper Wire 300 to 400 inches Roll
- Hot Glue Gun
- Duct Tape
- 16 Screws
- Wire Stripper
- 50 batteries
- Regular Skateboard
- A Non-Conductive Base
- Battery Holder
- ScrewDriver
- Electric Drill
- Measuring Tape
Step-By-Step Tutorial of Hoverboard Making:
Follow the steps below to get the detailed instructions.
Preparation of Base:
- First, spread Six railroad spikes on the base material.
- Then place them in a way that each one of them is 1 foot apart.
- Now, apply hot glue to the base of each spike and paste it on the material.
- Then to hold it tight, paste the duct tape and secure the railroad spikes.
- Wrap the wires around each railroad spike and leave no extra space.
- Leave a little piece of wire on both ends.
- Connect the upper wire to the negative end and the lower wire from the positive end of the battery
- Repeat the step with all the other iron railroad spikes.
Preparation of Skateboard:
- Unscrew all the plates and wheels from the skateboard.
- You will see eight holes on the board.
- Increase the diameter by 2 mm of all the holes.
- Drill four more holes on each side of the board; 2 ⅛ inches from the side and 2 ½ inches from the top and bottom.
- Drill two more Holes on each side 2 ½ inches away from the previous ones.
- The diameter of these holes should of the exact size of real ones.
- Take each screw and wrap magnet wire around it.
- Wrap it counterclockwise and leave no extra spacing between it.
- Place the magnetic wire screws in the holes you drilled before.
- Attach the power to each screw and put it in the battery holder.
- Connect the top wire with the negative end of the battery.
- Connect the positive end of the battery with the loose wire from the base.
Testing of the Hoverboard:
- Take your prepared base to a suitable place to test.
- Connect all the wires to their specific points.
- Take your skateboard with you.
- Give it a few minutes to warm up.
- Put the board on top, and you’ll see it hover on the surface!
- If not, adjust the wires carefully and give it another test run.
The electromagnetic push method is not complicated and easy to make. You don’t even need many resources to cover it up. But it is an art that only a few can master. Not everyone can get a vivid result with this method. So, it’s better to stick with traditional methods of making.
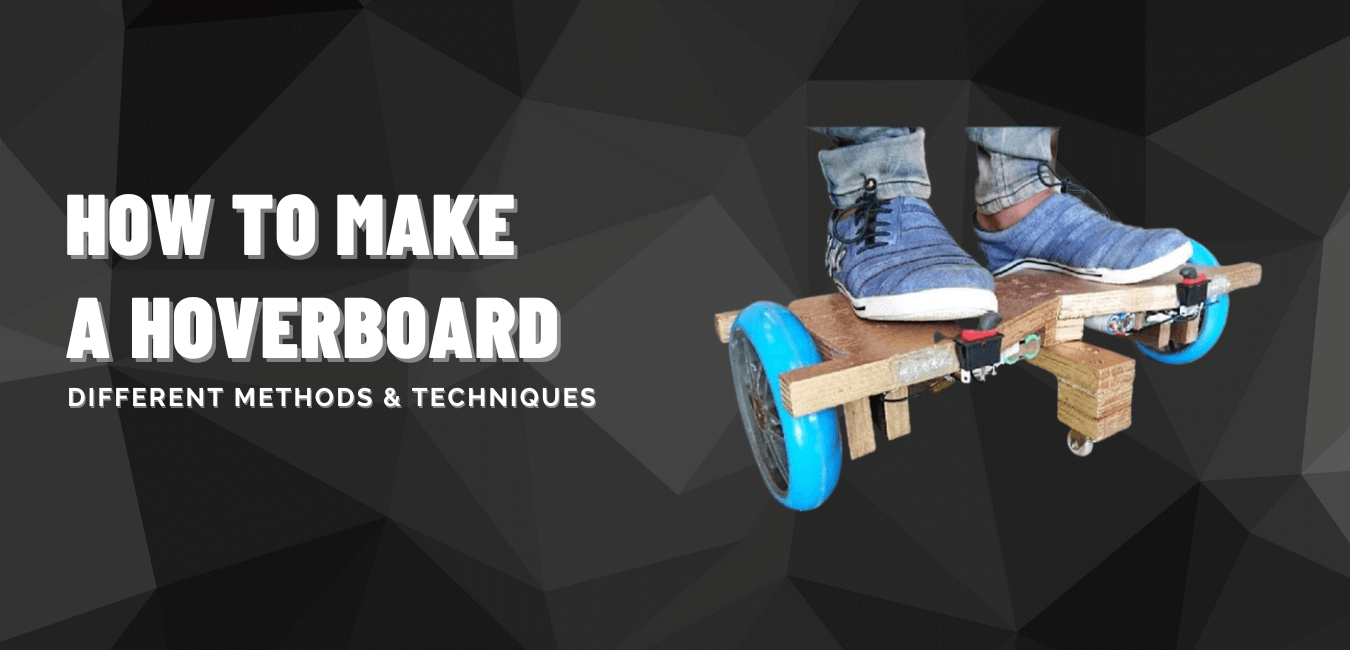
Wood Hoverboard- Laptop Battery Method
Making a hoverboard with wood and laptop batteries is considerably easy and effective. Though it comes with some prominent issues like safety and looks, I’d still prefer to give this one a chance. It is perfect for science projects or creative DIY. Not just that, I think constructing with wood and laptop is batteries cost way less than any other method.
So, let’s have a look at the materials you need.
Materials to Need:
- Four 12V laptop Batteries
- Dc Motor 10 RPM
- Castor Rotating Wheels 2 inches Diameter
- Bicycle Wheel 8 inches Diameter
- Plywood 15 mm Thickness
- 2 Push Switch
- Screw Driver
- Electric Drill
- Connecting Wires
Step-By-Step Tutorial of Hoverboard Making:
Follow the steps below to get the detailed instructions.
Preparation of Base:
This time the hoverboard is similar to the actual one, so you don’t need a separate base for it to move. The part of your hoverboard with all the electronics attached is the base. So, let’s see how to prepare it.
- First, cut the plywood in the shape of your hoverboard and sand the edges neatly.
- Attach two motors on each side of your hoverboard and connect two batteries on each side.
- To join the batteries, tape them together with the duct tape. (this way, it will stay in place)
- Glue all these items firmly on the base of your board.
- Then it’s time to connect the wheels. Join the wheels with the help of some glue and rollers.
- Connect the wires to your battery. Make sure you join the accurate ends and take safety precautions in mind.
- Now, to give balancing support, cut a long piece of wood and attach it to the middle section of your base.
- Attach two small wheels on both ends (it will give both stability and rotation).
- After that, attack some wood blocks to support all the other attachments.
- Flip your board and color it the way you want. Don’t forget that you are making it for fun, so unleash your creativity on it.
- Now, take your hoverboard for some test runs, and make sure you get through all the challenges to finding its best stability.
- If you find any problems in working, recheck the wiring and unplug the motor.
- Test it at least five times to have the best results and never settle on less.
- Never ignore the safety measures like helmets and elbow pads.
Important Tip:
Using this method to make a hoverboard is uncomplicated, I’d say, not the ideal choice for your kid. It is dangerous and needs mastery to build it. So, if you are planning to get your hands on it, make sure you have the proper equipment and skill set.
My Remarks:
You should go for the Wood and Laptop Batteries Method if you think your woodworking abilities are substantial. As your minor fault can lead to drastic results. So that’s the reason I pressure you to take a quick scan of yourself.
PVC and Wood Hoverboard- Overall Method
We’ll discuss this method in more detail, as you can get better sustainability and stability here. Not to forget the durability and economic factor that people always prefer. It is fun and easy to make, so no worries kiddos, You are good with your college project!
One more thing, PVC can be dangerous to play with, so make sure you keep your safety in mind. Now, without wasting any time, let’s get into it.
Materials to Need:
- 12 V DC Motor
- 12 V Battery
- 8 inches Bicycle Wheels
- 2 inches Castor Rotating Wheels
- 15 to 16 mm Plywood
- 2 Push Switch
- Wood Glue
- Connecter
- Screws and Nuts
- Four 1-inch PVC T-Pipes
- Four 1-inch PVC Elbow Pipes (90 degrees)
- Nine 1-inch PVC Straight Pipes
- Screw Driver
- Hacksaw Cutter
- Electric Drill
- Measure Tape
- Spanner set
- Pen to Mark
Step-By-Step Tutorial of Hoverboard Making:
That was a long list of materials, Right? But don’t worry, we are not going into something very complicated. Follow the steps below and get the detailed instructions.
Preparation of Material:
- The first step is to get the wheels for your hoverboard. For this, remove the wheels of mentioned size from a kid’s bicycle. Remove all the nuts and bolts carefully without destroying the part. You can take the help of any extra tool like an axle. Don’t forget to get the right size, or it’ll affect your stability.
- Second, get your PVC pipes in place. Cut them into the perfect sizes. Take Four small pieces of 2mm straight pipes, Four long pieces of 7mm straight pipes, Four elbow Pipes, and four T Pipes.
- Select a firm piece of 15 mm thick plywood. Get it neatly sanded using low grit sandpaper. Don’t forget to give it a little polish for a neat look.
Making of PVC Frame:
- The first step is assembling all the perfectly sized PVC pipes. Place them on the board and sand the edges to save yourself from any unnecessary cuts.
- Start the joining process by starting with small pieces. Join two elbow pipes on each side of a 2cm straight pipe. You’ll have two sides of the frame by now.
- Then, attach the long pipes on each elbow pipe and make three sides of a square. You will have two such pieces.
- Now it’s time to join the blocks. Use two T-pipes to connect both sides. It will look like a rectangle.
- Place another long piece in the middle with the T-pipes. You can see an eight-shaped frame.
Constructing Slots and Hole:
- Now it’s time to add some slots and holes for the things you need to attach.
- Cut four small pieces of plywood and attach them to the base of your board in a shape of a square.
- Make sure the square size fits the battery and fix the board firmly.
- Drill two holes in the side of the board with a slightly larger diameter than your wheel’s axle.
- Make extra holes to attach the frame to the base of your board.
- Use an electric drill to drill two holes on each side of the board for wheels and four holes on corners for the frame.
- Make two extra holes on the front for the push switches.
Fitting of the Frame:
- First, take the frame you make with PVC pipes and place it on the center of your board.
- Use the pen to mark along the elbow pipes to get a perfect point. Note that these are the holes we made earlier on the board.
- Now you have four holes on each corner which are perfect for fixing the PVC frame.
- Drill the exact holes on the elbow pipes to get the screws through them.
- Insert the screws in the holes in the board.
- Place the frame accordingly and use nuts to tighten those screws you get through the pipes.
- Make sure the frame is decently aligned and has no loose screws.
Selection of Motor:
- Buy two 12 V DC Motors and make sure they have 10 RPM.
- Getting a motor with a high value of RMP will cause problems with the rider’s stability.
- The third thing to look for in a motor is its material. Always go for a metal building as it is more durable and works well for such use.
- Lastly, make sure your motor has a high torque value. It will help in the stability we look at in a hoverboard.
- Not to forget the clamps. Get clamps of the size of your motor. It will help in attachment.
Fitting of Motor:
- First, the thing to do is take your 12 V Dc motor and get the wires straight.
- For this, you need two things, a clamp, and glue. They will both help you to get a firm finishing.
- Fit the motor in the T-pipe with the help of the clamp. Make sure you insert it to the desired length.
- After that, use glue to make things more strong. Apply glue to the joints of the motor and the pipe.
- After fitting it in, use nuts and screws to attach it to the board where you drilled the holes earlier.
- The clamps will hold it tight on the base of your hoverboard.
Addition of Push Switches:
- The first thing to know is that you can never get both wheels to work from the same switch.
- You can’t have self-balancing features as it requires some very complicated technologies.
- Drill two holes in the front and attach the switches to them.
- Make sure you place the switches where your thumb can access them easily. As with each thumb, you’ll control the hoverboard.
- You can easily find them in any tools shop, so try to get as small as you can. A large push switch can be hard to operate.
Attaching Rotating Wheels:
- To make your hoverboard more stable, attaching small rotating wheels is essential.
- These wheels will give balance and give your hoverboard the ability to rotate.
- Drill holes on both T-pipes and attach the 2 inches diameter rotating wheels at both fronts and back.
- Make sure you get them of accurate height, or else you have to spend time on extra adjustments.
- One more thing, even though it’s not essential but try to match the color with your main wheels. It will not clash with the look.
- Adding the rubber tires is the most vital part.
- For this, we prefer to take the tires from a bicycle with an eight inches diameter.
- Don't forget to look fr tires with a shaft diameter similar to the motor.
- Insert the Motor edge in the shaft and fix it with an M-seal.
- You should wait for at least 24 hours for it to dry.
Wiring the Circuit:
- Take four 12 V batteries from any store and attach them in a series connection.
- Drill holes on the T-pipes and attach the wires through them.
- To finish the work, wrap some elastics on the motor around the wheel. It will give it a firm grip.
Testing the Hoverboard:
Like every other hoverboard, having a test ride is as necessary for this one. You can take the hoverboard at least three times and check all the faulty possibilities.
If you still find issues, rewire everything and test that again! Don’t miss the chance to make your hoverboard the best.#
Frequently Asked Questions (FAQ):
Can I use wheels from an old kid's cycle for my DIY hoverboard?
Yes, you can use wheels from an old kid’s bicycle for your hoverboard.
How can I make my DIY hoverboard look more stylish?
You can make your DIY hoverboard look stylish by using neat materials and adding creativity afterward.
What is an electromagnetic push, and how can I make my hoverboard move from it?
By using current and accurate directions, you can create an electromagnetic force. This force can push your hoverboard and make it move.
Why using PVC Pipes is the best option for hoverboard making?
PVC pipes are multi-functional and lightweight. It makes it suitable to use s a base for a hoverboard.
Which method of hoverboard making costs the least?
Using wood and laptop batteries is economically most suitable. But as it requires a lot of skillsets, people mostly avoid it.
Conclusion:Imagination always leads a man to go for a more thrilling and exciting way of doing things. Similarly, when people think about hovering, they want to devise new, fun ways. Instead of buying it a traditional way, they tend to make it themselves. So for this, most of them go looking for some DIY ideas.
If you are also one of those men, this article will help you for sure. From economical to the most effective methods, we get you everything to start. Not just that, with an elaborate tutorial on how to make a hoverboard, anyone can have a homemade hoverboard. And don’t forget to miss the most helpful tips! So, buckle up and remember to throw caution to the wind!